
Anyone who works for a long time with Excel tables, faces situations when you need to transfer one or more columns down. This may be due to the fact that a large number of data should be made to the working area or you need to compare hotel tables (columns) among themselves. There is no separate tool for performing this action in Excel. However, this can be done by combining the capabilities of this program among themselves. On the proven methods of moving the table Talk more in this article.
Moving one or more columns through the "Cut" and "Copy" function + "Paste"
The proven and most popular method of moving the table down or other parties - through the "Cut" and "Paste" function. However, it is important to take into account that the procedure will be somewhat different depending on that one column or a whole table will be shifted. Procedure for moving one column:
- Initially, you need to highlight a whole column with information. To do this, click on the Latin letter in its title.
- To cut the column, you can press the key combination - Ctrl + x. The second option is to call the context menu by pressing the right mouse button along the column header, select the "Cut" function.
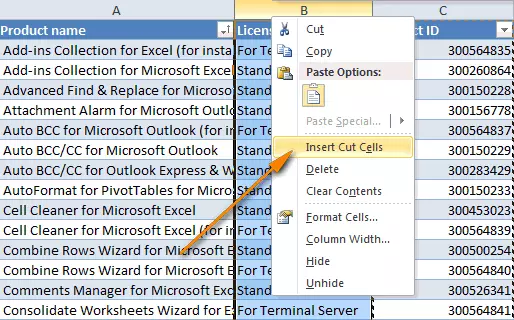
- The mouse is highlighted where you need to move the column. Click PKM, select the "Insert Cut Cut Cut" function.
- The selected initially element of the working table will be transferred to the selected location.
To shift several adjacent columns at once, you can use one of 3 ways:
- Using functions - "Copy" + "Insert" + "Delete" (excess remaining item).
- Using commands - "Cut" + "Insert".
- Dragging the mouse.
The process of moving one or more table columns through commands "Copy" + "Insert" + "Delete":
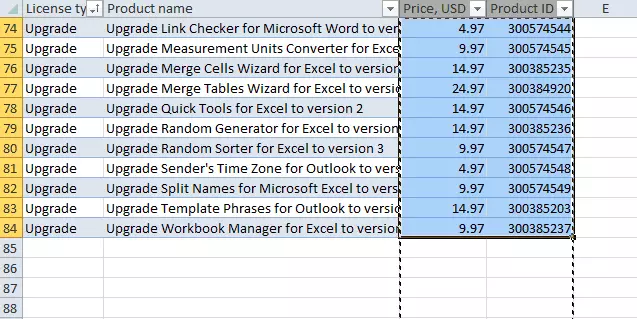
- First of all, you need to highlight one or more columns you need to move. You can make it mouse or through the keys on the keyboard (SHIFT - you must climb this button, click on the header of the first column, without releasing the keys, click on the header of the last column from the range of the range).
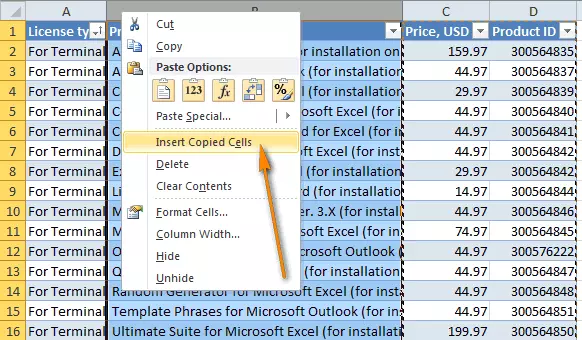
- Next, it is necessary to mark the place in the table where you want to move the dedicated range with the data (pressing the left mouse button). Click PCM on the selected place, from the context menu, select the "Insert copied cells" function.
- The latter action you need to re-select the initial column with the data, click PCM to call the context menu, click the "Delete" button.
The easiest way to move individual columns or immediately multiple in the Excel table - dragging the mouse. Procedure:
- The mouse is allocated one or more columns. If you combine the LKM with the SHIFT button, you can quickly mark the range.
- Cut the mouse cursor to the border of the column or the marked range, in which direction it will shift. It is important to wait for the appearance of an image of a cross with the arrows diverge in different directions.
- Next, you need to hold the Shift key, drag the range of the range where you need to shift it for the selected border.
When 1 or several columns will be moved to the desired location, you need to release the mouse button and the SHIFT key.
Use macrosUsers who have a high level of work with Excel tables will simply simply use a special macro to move individual elements of the table, dedicated ranges to marked areas. To implement this procedure, you must independently write a VBA macro. However, this method has a significant drawback. A long time is time to configure the macro to the column or marked range to be transferred to the desired table location.
Move one or more table linesSpecial attention should be given to a sufficiently common procedure - offset down-up one or more table rows. The process of moving one line:
- Press the left mouse button by the number of the line that must be moved (the scale with numbers is located on the left side of the table).
- After the selected field appears, drop the mouse with a clamped LKM to the desired number of rows down.
When the selected line is located in the desired place, you need to release the mouse button. The procedure for moving adjacent lines:
- Left-click on the first line number from the range. Click the Shift key.
- Scroll the mouse to scroll the table.
- Release the SHIFT button after the required range of lines is highlighted.
After that, it remains to press LKM on any number of selected lines, shift the entire range down. The displacement process down several lines located separately from each other:
- Click the Ctrl button.
- Left mouse button mark all the lines that need to be moved.
Press the LKM on any number of selected lines, move them to a certain place down, let go of the mouse button.
Conclusion
The process of moving a working table or a dedicated range is quite complicated, if you do not know how to combine the basic functions of Excel. It is much easier to displaced individual elements of the working element in the left or right side. However, having understood with the procedure of moving down more in the theory, in practice there should be no difficulty.
A message as in Excel move the table down appeared first to information technology.